Before you can create a schedule, scheduling has to be activated and your content needs tags that describe the structure of the exam.
Video: Preparing the content (3:26)
Activate Scheduling
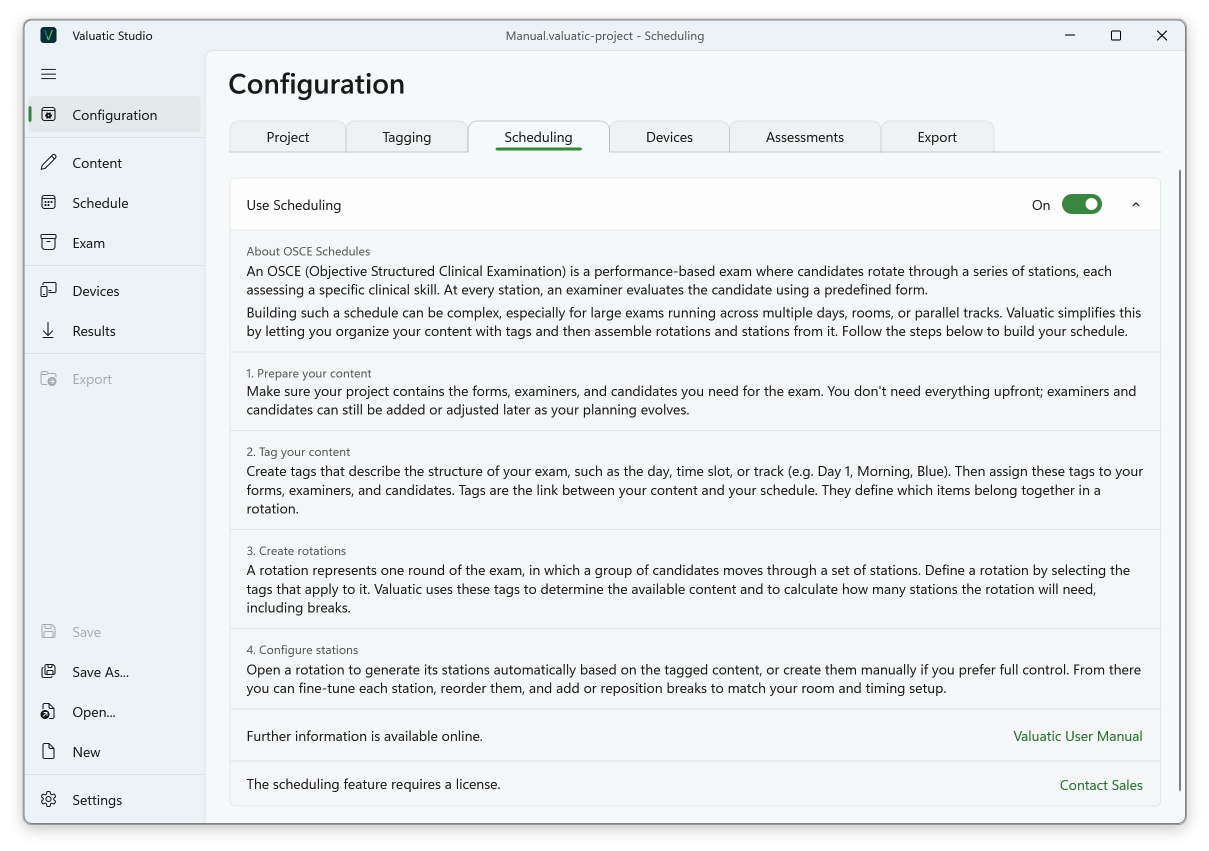
- Switch to the Configuration screen on the left-hand side.
- Select the Scheduling tab.
- Set Use Scheduling to On.
This also turns on tagging, and the Schedule screen appears in the navigation on the left-hand side.
Create the Tags
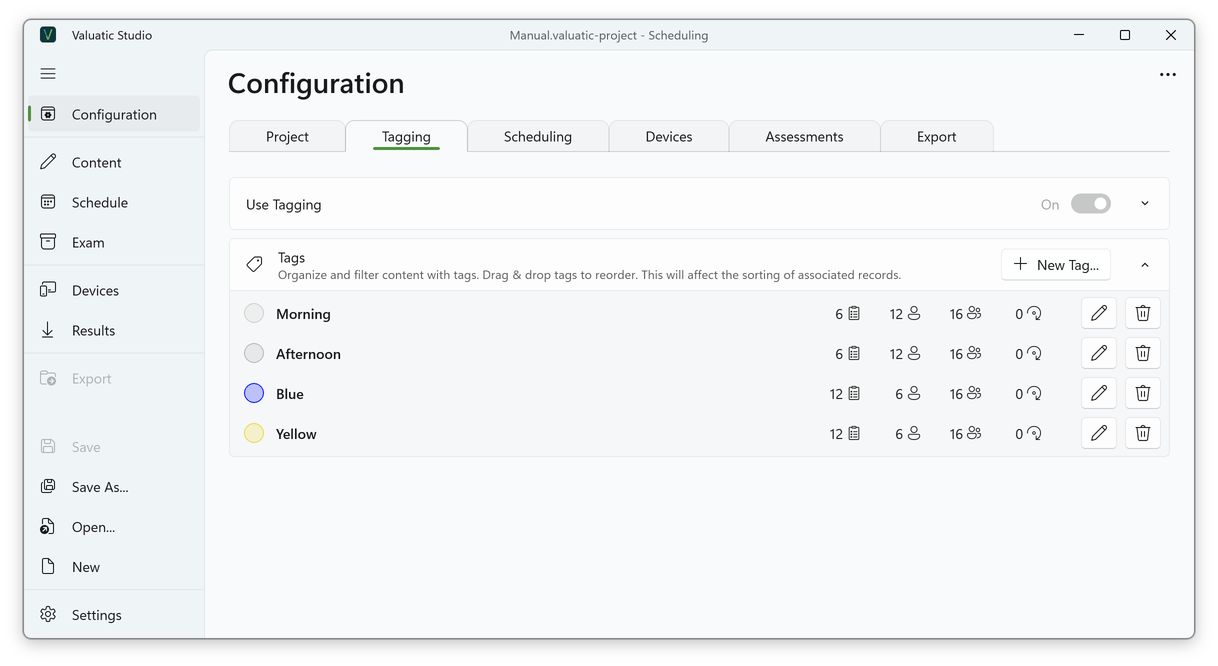
Select the Tagging tab and click New Tag… to create the tags of the exam. In the example, these are Morning and Afternoon for the sessions, and Blue and Yellow for the parallel rotations.
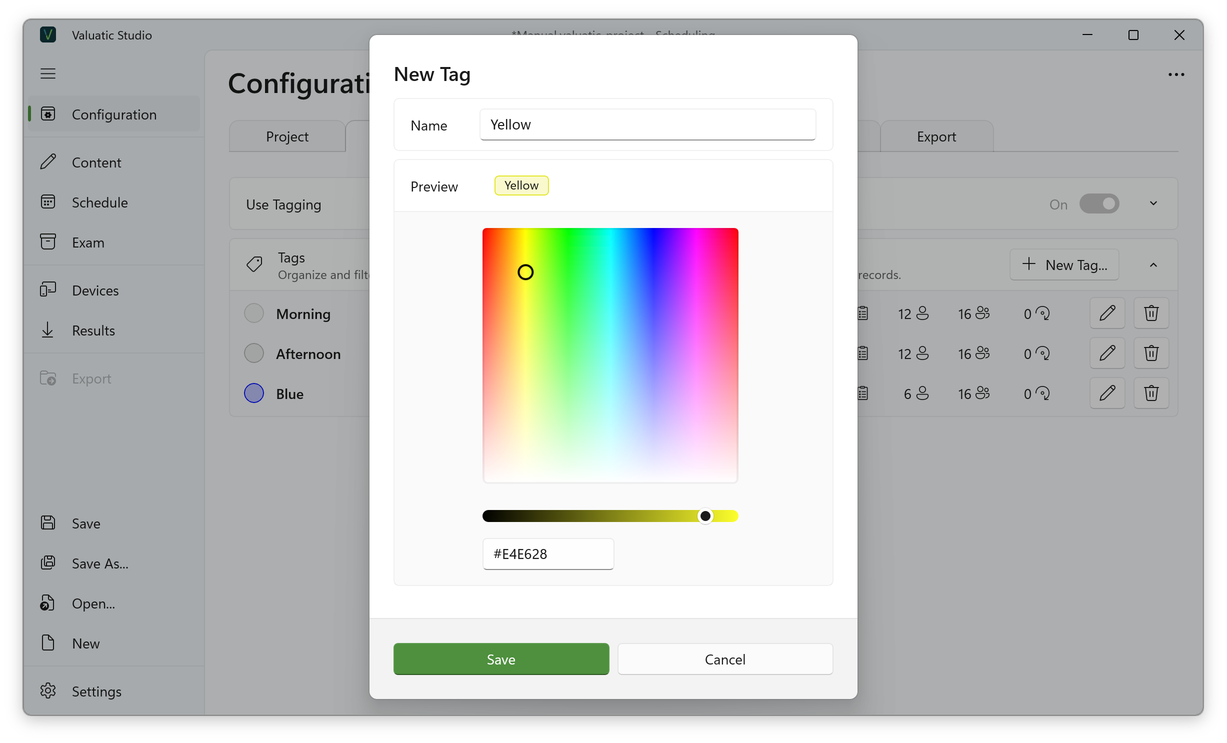
In the New Tag dialog, enter the name and optionally choose a colour, which makes the tag easy to recognise in lists. The preview shows how the tag will look.
The order of the tags matters: it is used for sorting and for the suggested names of the rotations. Reorder the tags by drag and drop.
For each tag, the list shows how many forms, examiners, candidates and rotations use it.
Tag the Forms
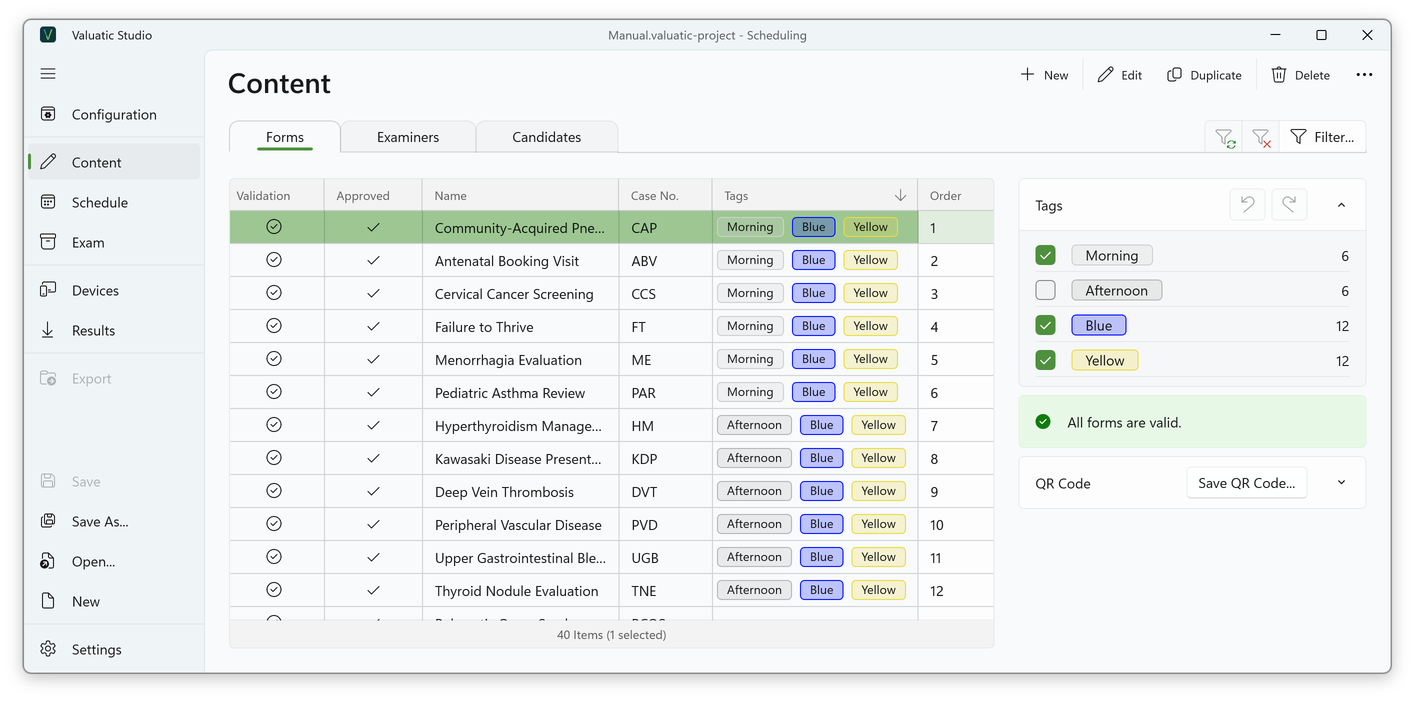
- Switch to the Content screen and select the Forms tab.
- Select one or more forms.
- Tick the matching tags in the Tags panel on the right. For each tag, the panel shows how many items carry it.
In the example, the morning forms get Morning, Blue and Yellow, because both rotations of the morning use them. The afternoon forms get Afternoon, Blue and Yellow. The tags of each form are shown in the list, so you can check them at a glance.
The Order column defines the order of the stations: the form with order 1 becomes station 1, and so on.
Tip: Order the forms like your room plan, so station 1 is the first room of the circuit, station 2 the next, and so on.
Forms without the tags of a rotation, like other cases in your project, are simply ignored by the schedule.
Tag the Examiners
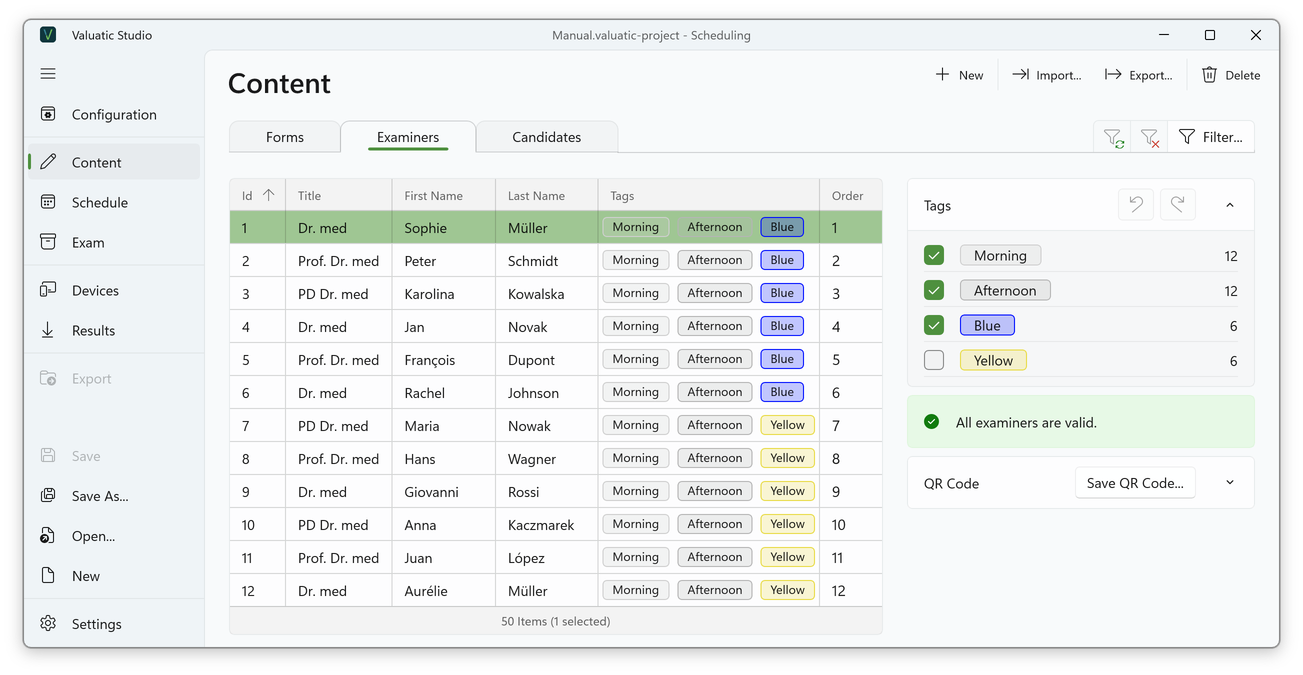
Select the Examiners tab and tag the examiners the same way. In the example, the blue examiners get Morning, Afternoon and Blue, because they assess in both sessions; the yellow examiners get Morning, Afternoon and Yellow.
The order of the examiners defines at which station each examiner is placed.
Tag the Candidates
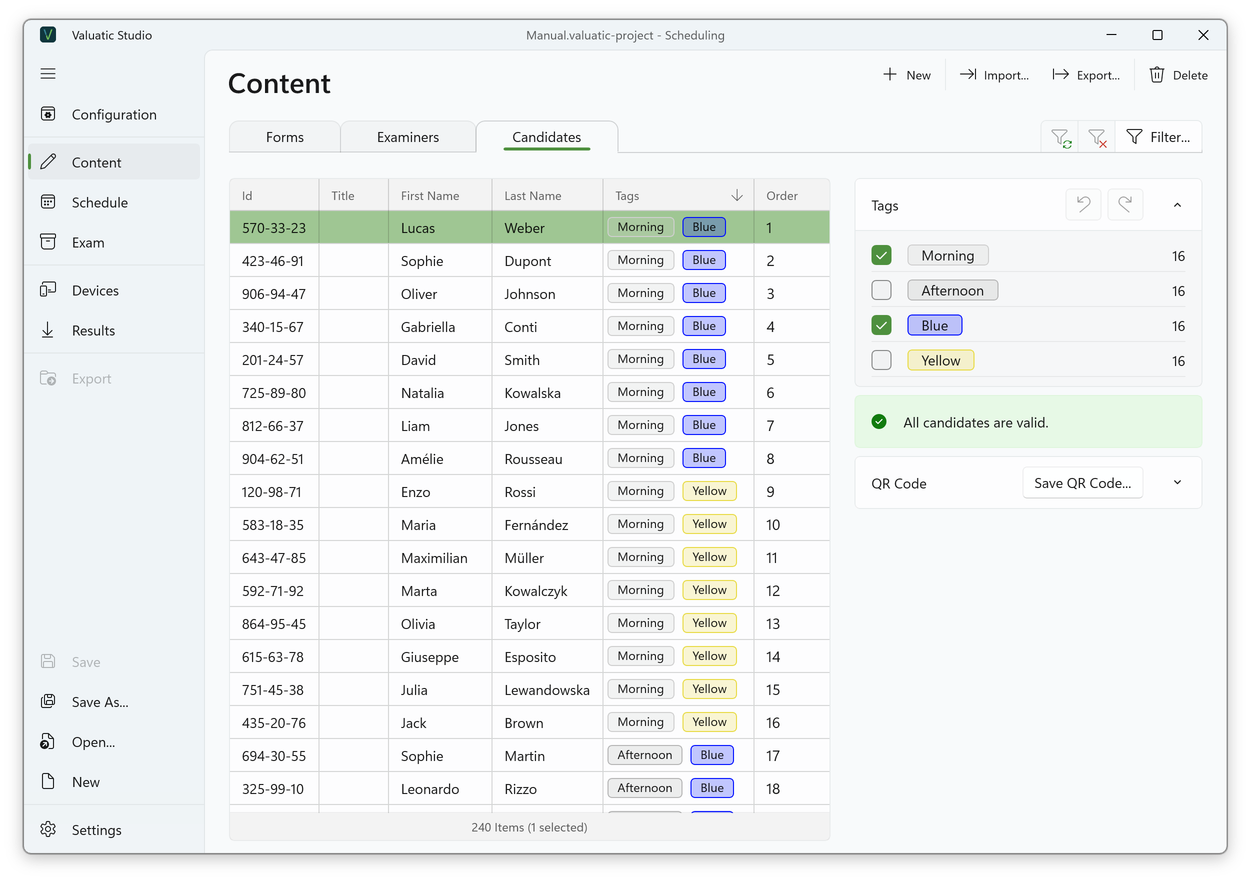
Select the Candidates tab. Each candidate belongs to exactly one rotation, so a candidate gets one session tag and one colour tag, e.g. Morning and Blue.
The order of the candidates defines where each candidate starts: order 1 starts at the first station, order 2 at the second, and so on.
Note: If no order is set, forms, examiners and candidates are sorted alphabetically.
With many candidates, tagging by hand takes time. Tags and order can also be imported with the candidates, as described in Content and Tags.
Next: Create a Rotation