The scheduling feature has not been released yet — it will be available with Valuatic 4.0.
This documentation is preliminary and subject to change.
Subscribe to our newsletter to get notified when it becomes available.
Create a Schedule
This guide shows you how to build your first OSCE schedule in a few simple steps: activate scheduling, tag your content, and let Valuatic assemble the rotations and stations for you.
Note: Make sure your project already contains the forms, examiners, and candidates you need for the exam. You don’t need everything upfront; examiners and candidates can still be added or adjusted later as your planning evolves.
Activate Scheduling
- Switch to the Configuration screen on the left-hand side.
- Select the Scheduling tab.
- Set Use Scheduling to On.
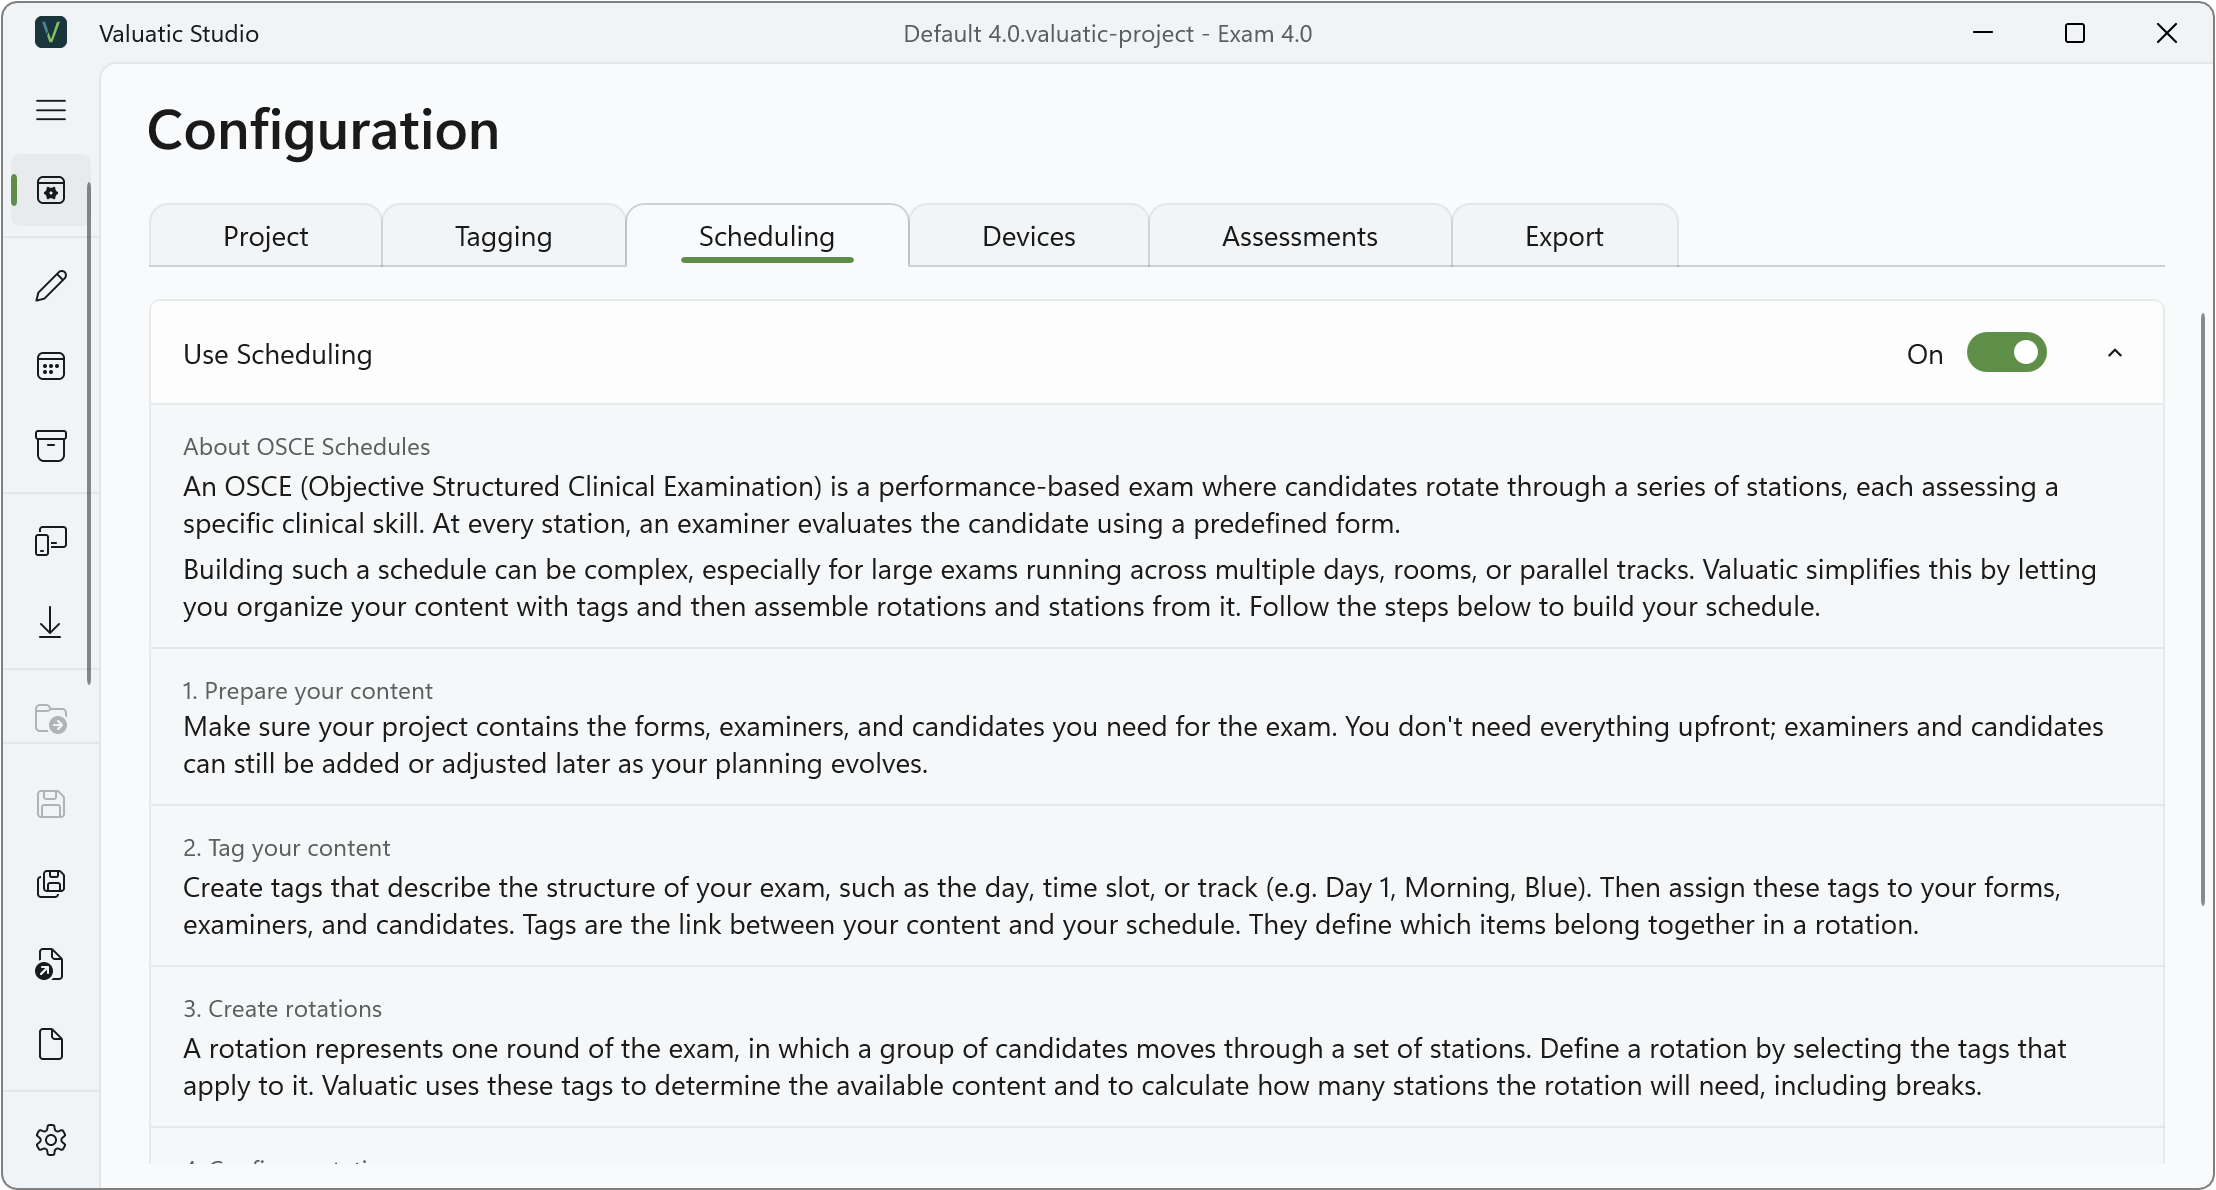
The Schedule screen is now available in the navigation on the left-hand side.
Define Tags
Tags are the link between your content and your schedule. Create tags that reflect the structure of your exam, such as the day, time slot, or track.
- Select the Tagging tab on the Configuration screen.
- Click + New Tag… and create tags matching your setup (e.g. Day 1, Day 2, Yellow, Blue).
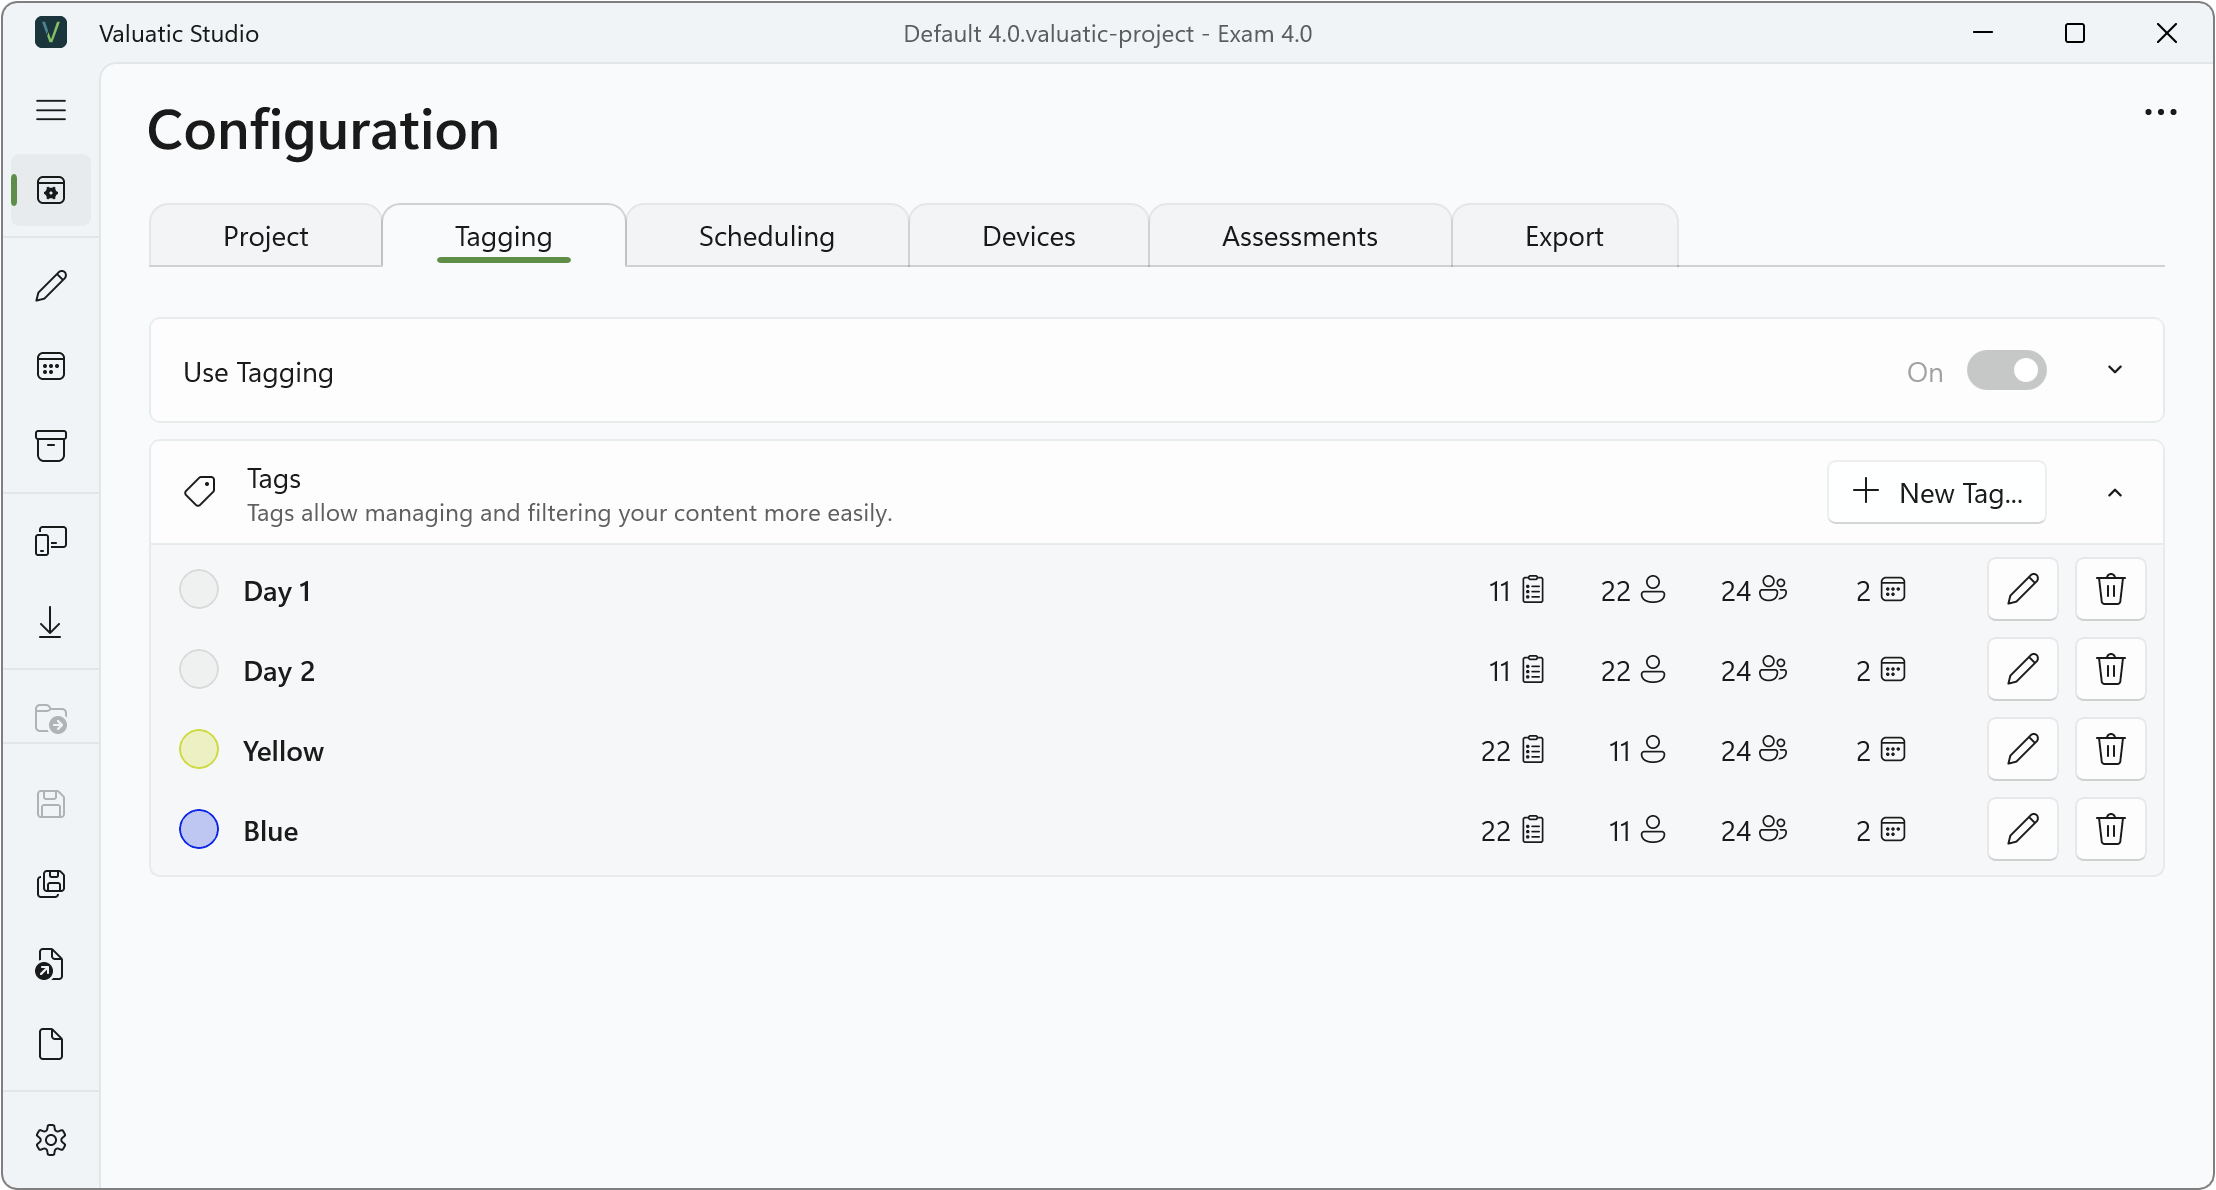
The tag list shows how many forms, examiners, candidates, and rotations are associated with each tag.
Tag Your Content
Now assign the tags to your content. The tags define which items belong together in a rotation.
Forms
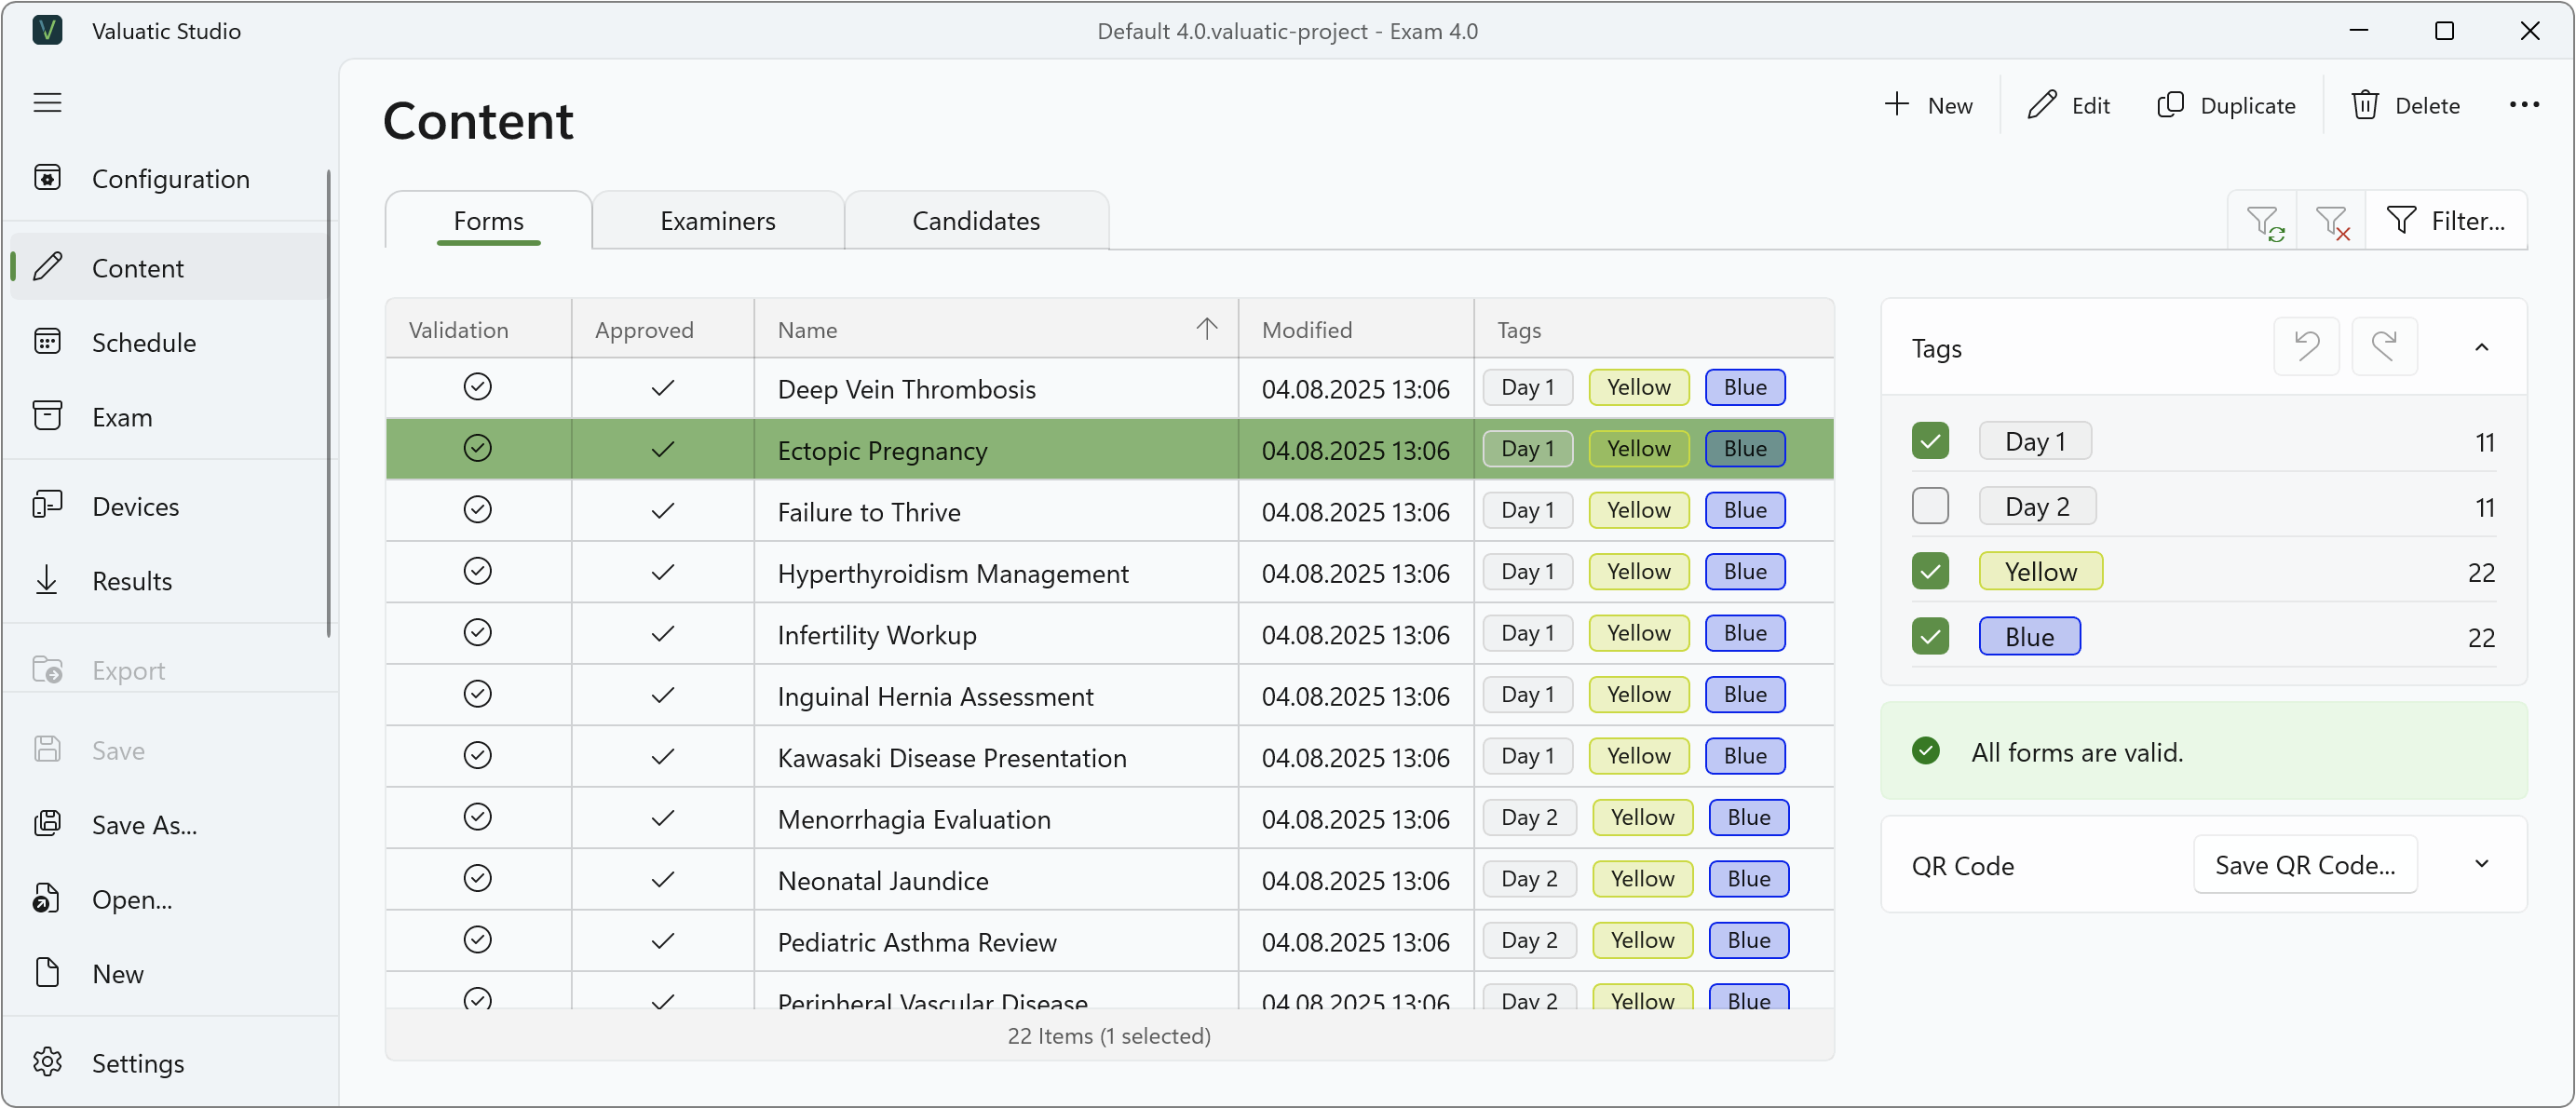
- Switch to the Content screen and select the Forms tab.
- Select one or more forms.
- Check the applicable tags in the Tags panel on the right (e.g. Day 1, Yellow, Blue).
Examiners
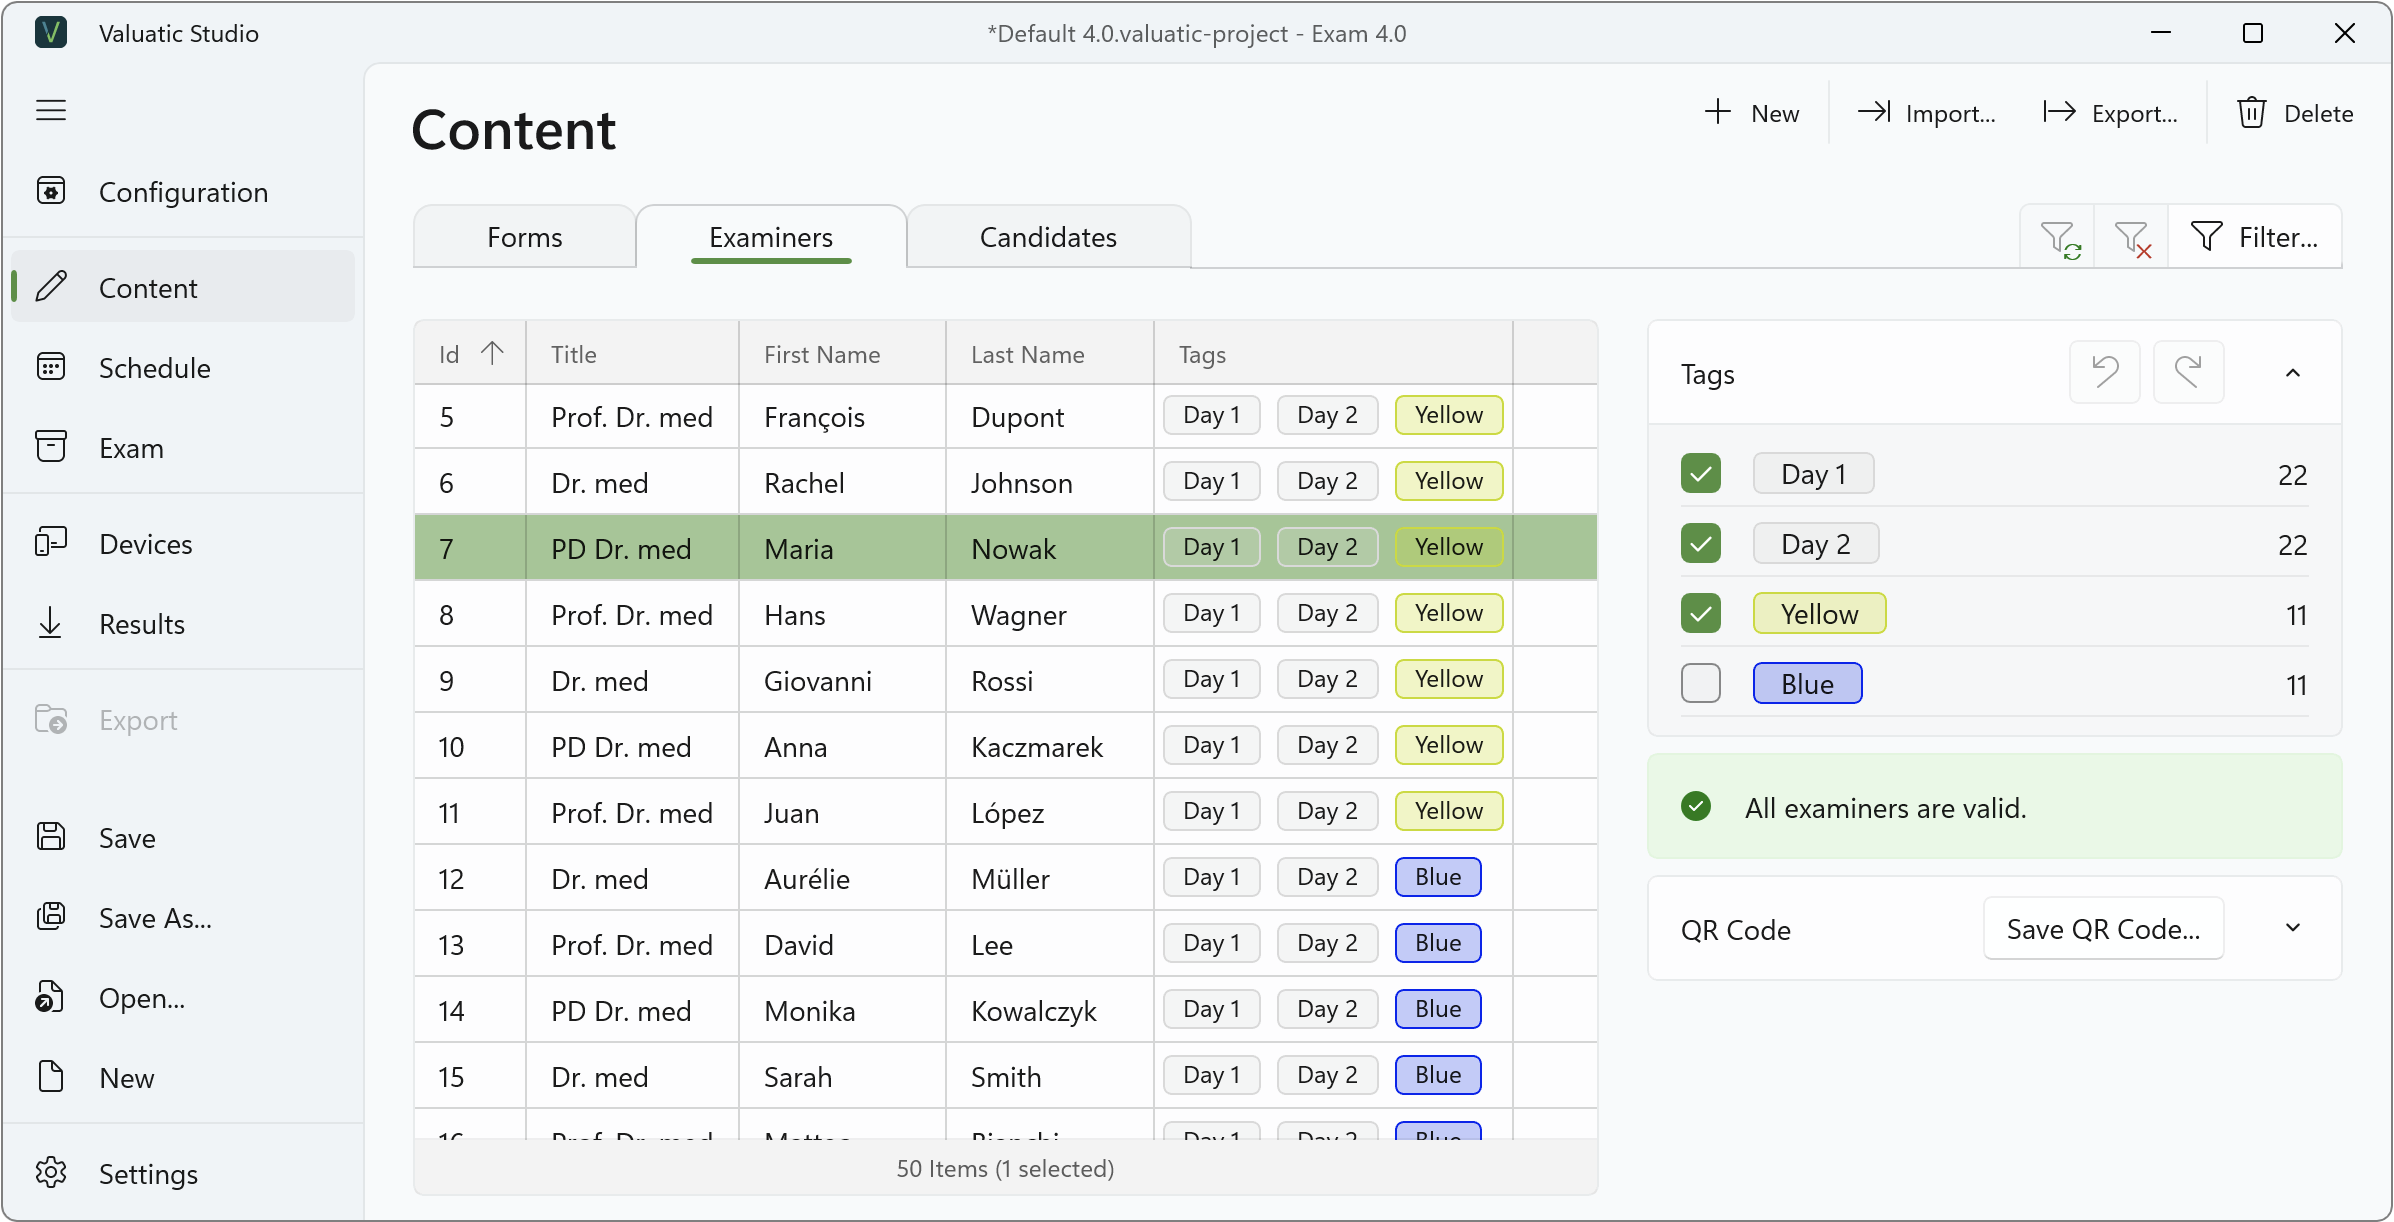
- Select the Examiners tab.
- Select the examiners and assign their tags, e.g. the days they are available and the track they belong to.
Candidates
- Select the Candidates tab.
- Select the candidates and assign their tags, e.g. Day 1 and Blue for the blue track on the first day.
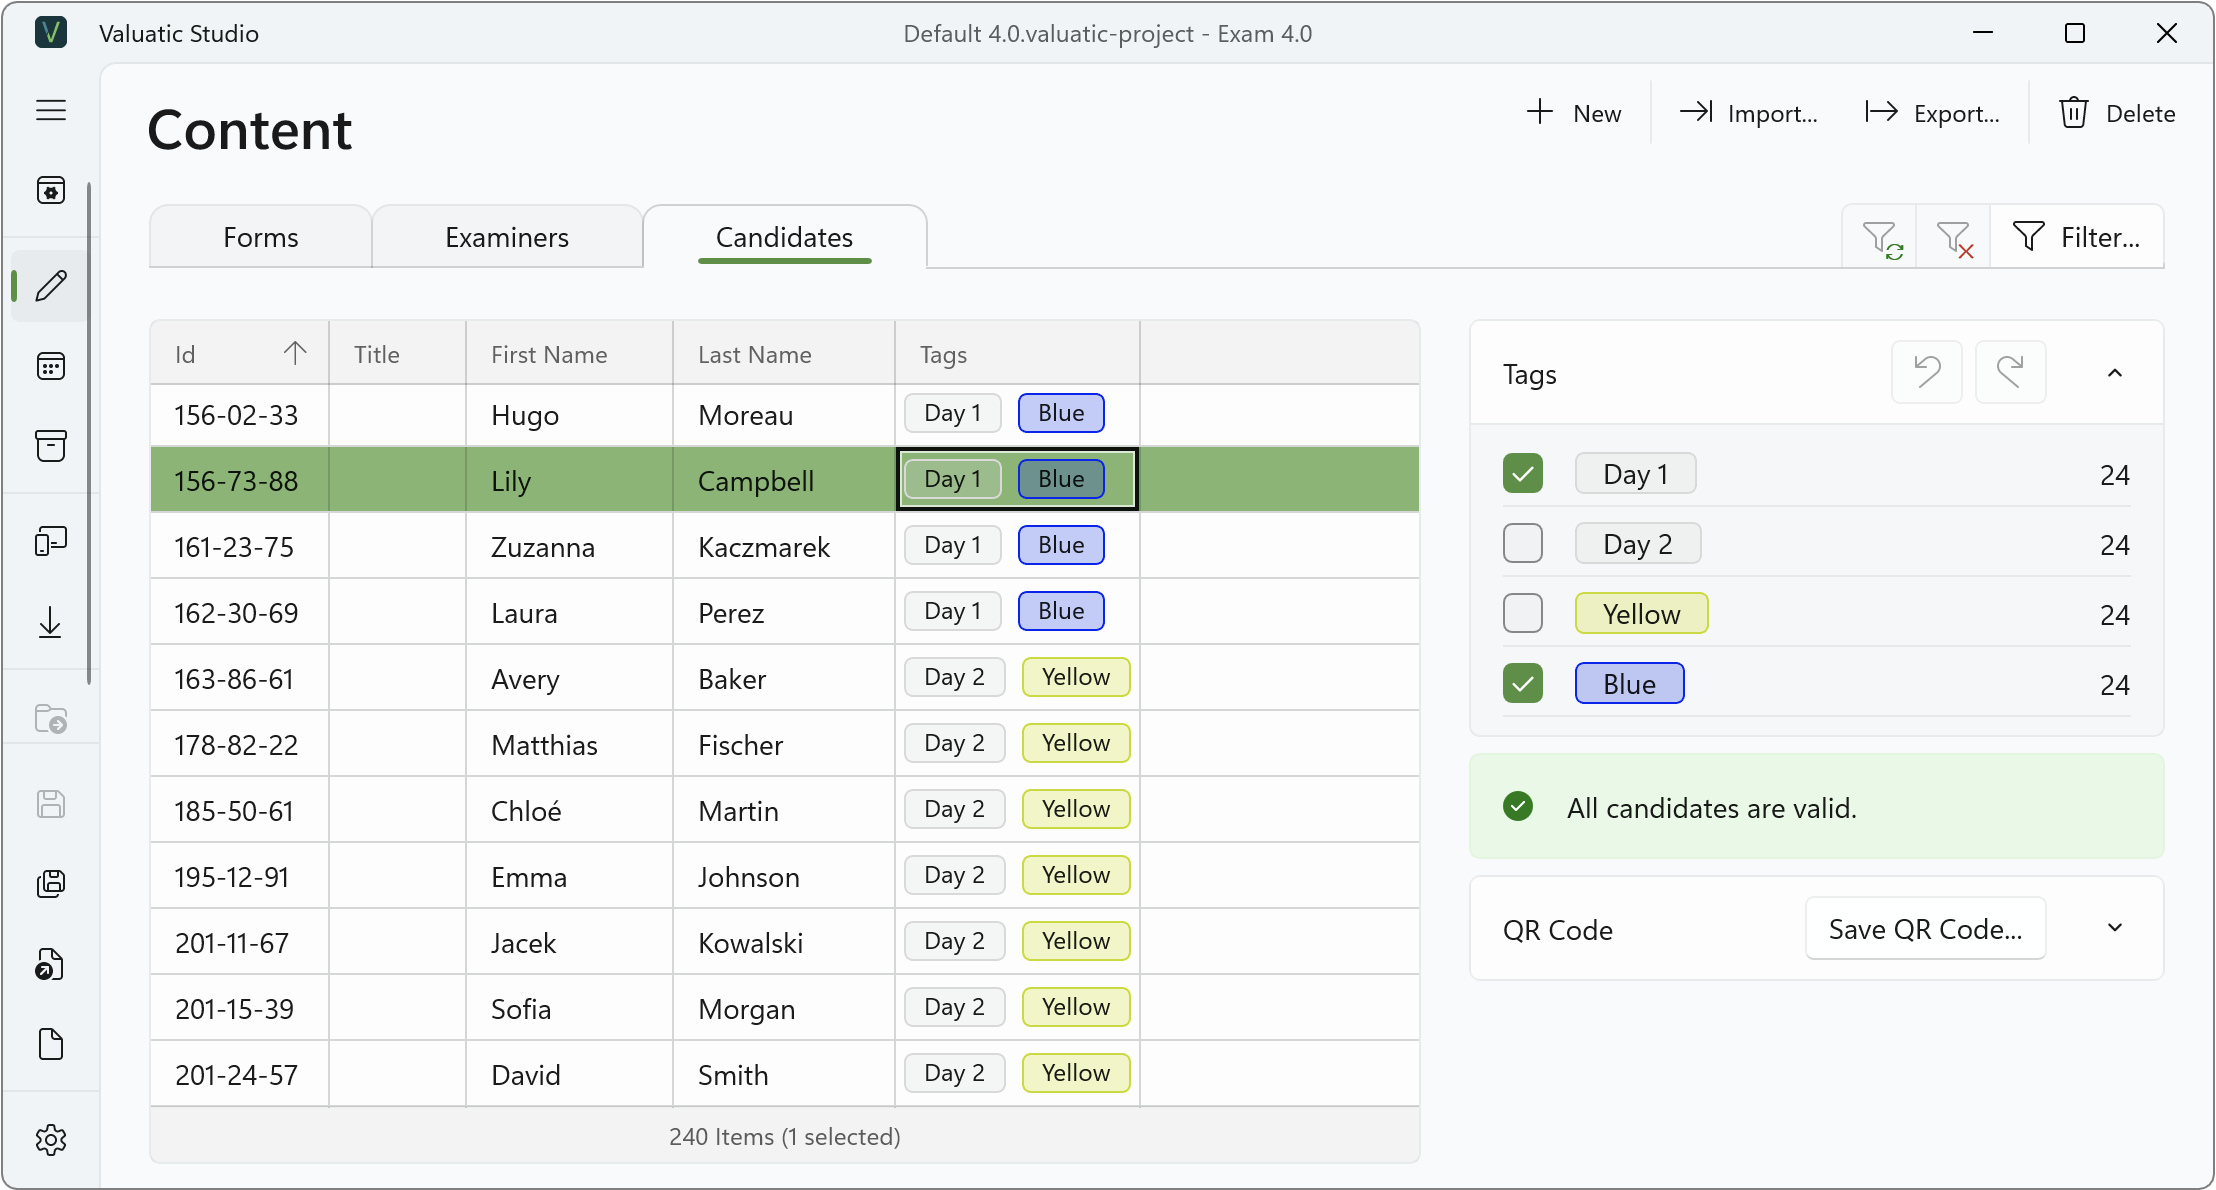
Note: The number next to each tag in the Tags panel shows how many items currently carry that tag — a quick way to verify your setup.
Create a Rotation
A rotation represents one round of the exam, in which a group of candidates moves through a set of stations.
- Switch to the Schedule screen on the left-hand side.
- Click + New… on the Rotations tab.
- Select the tags for this rotation (e.g. Day 1 and Yellow). Content items must match all selected tags to be part of the rotation.
- Keep the suggested name or enter your own, then click Save.
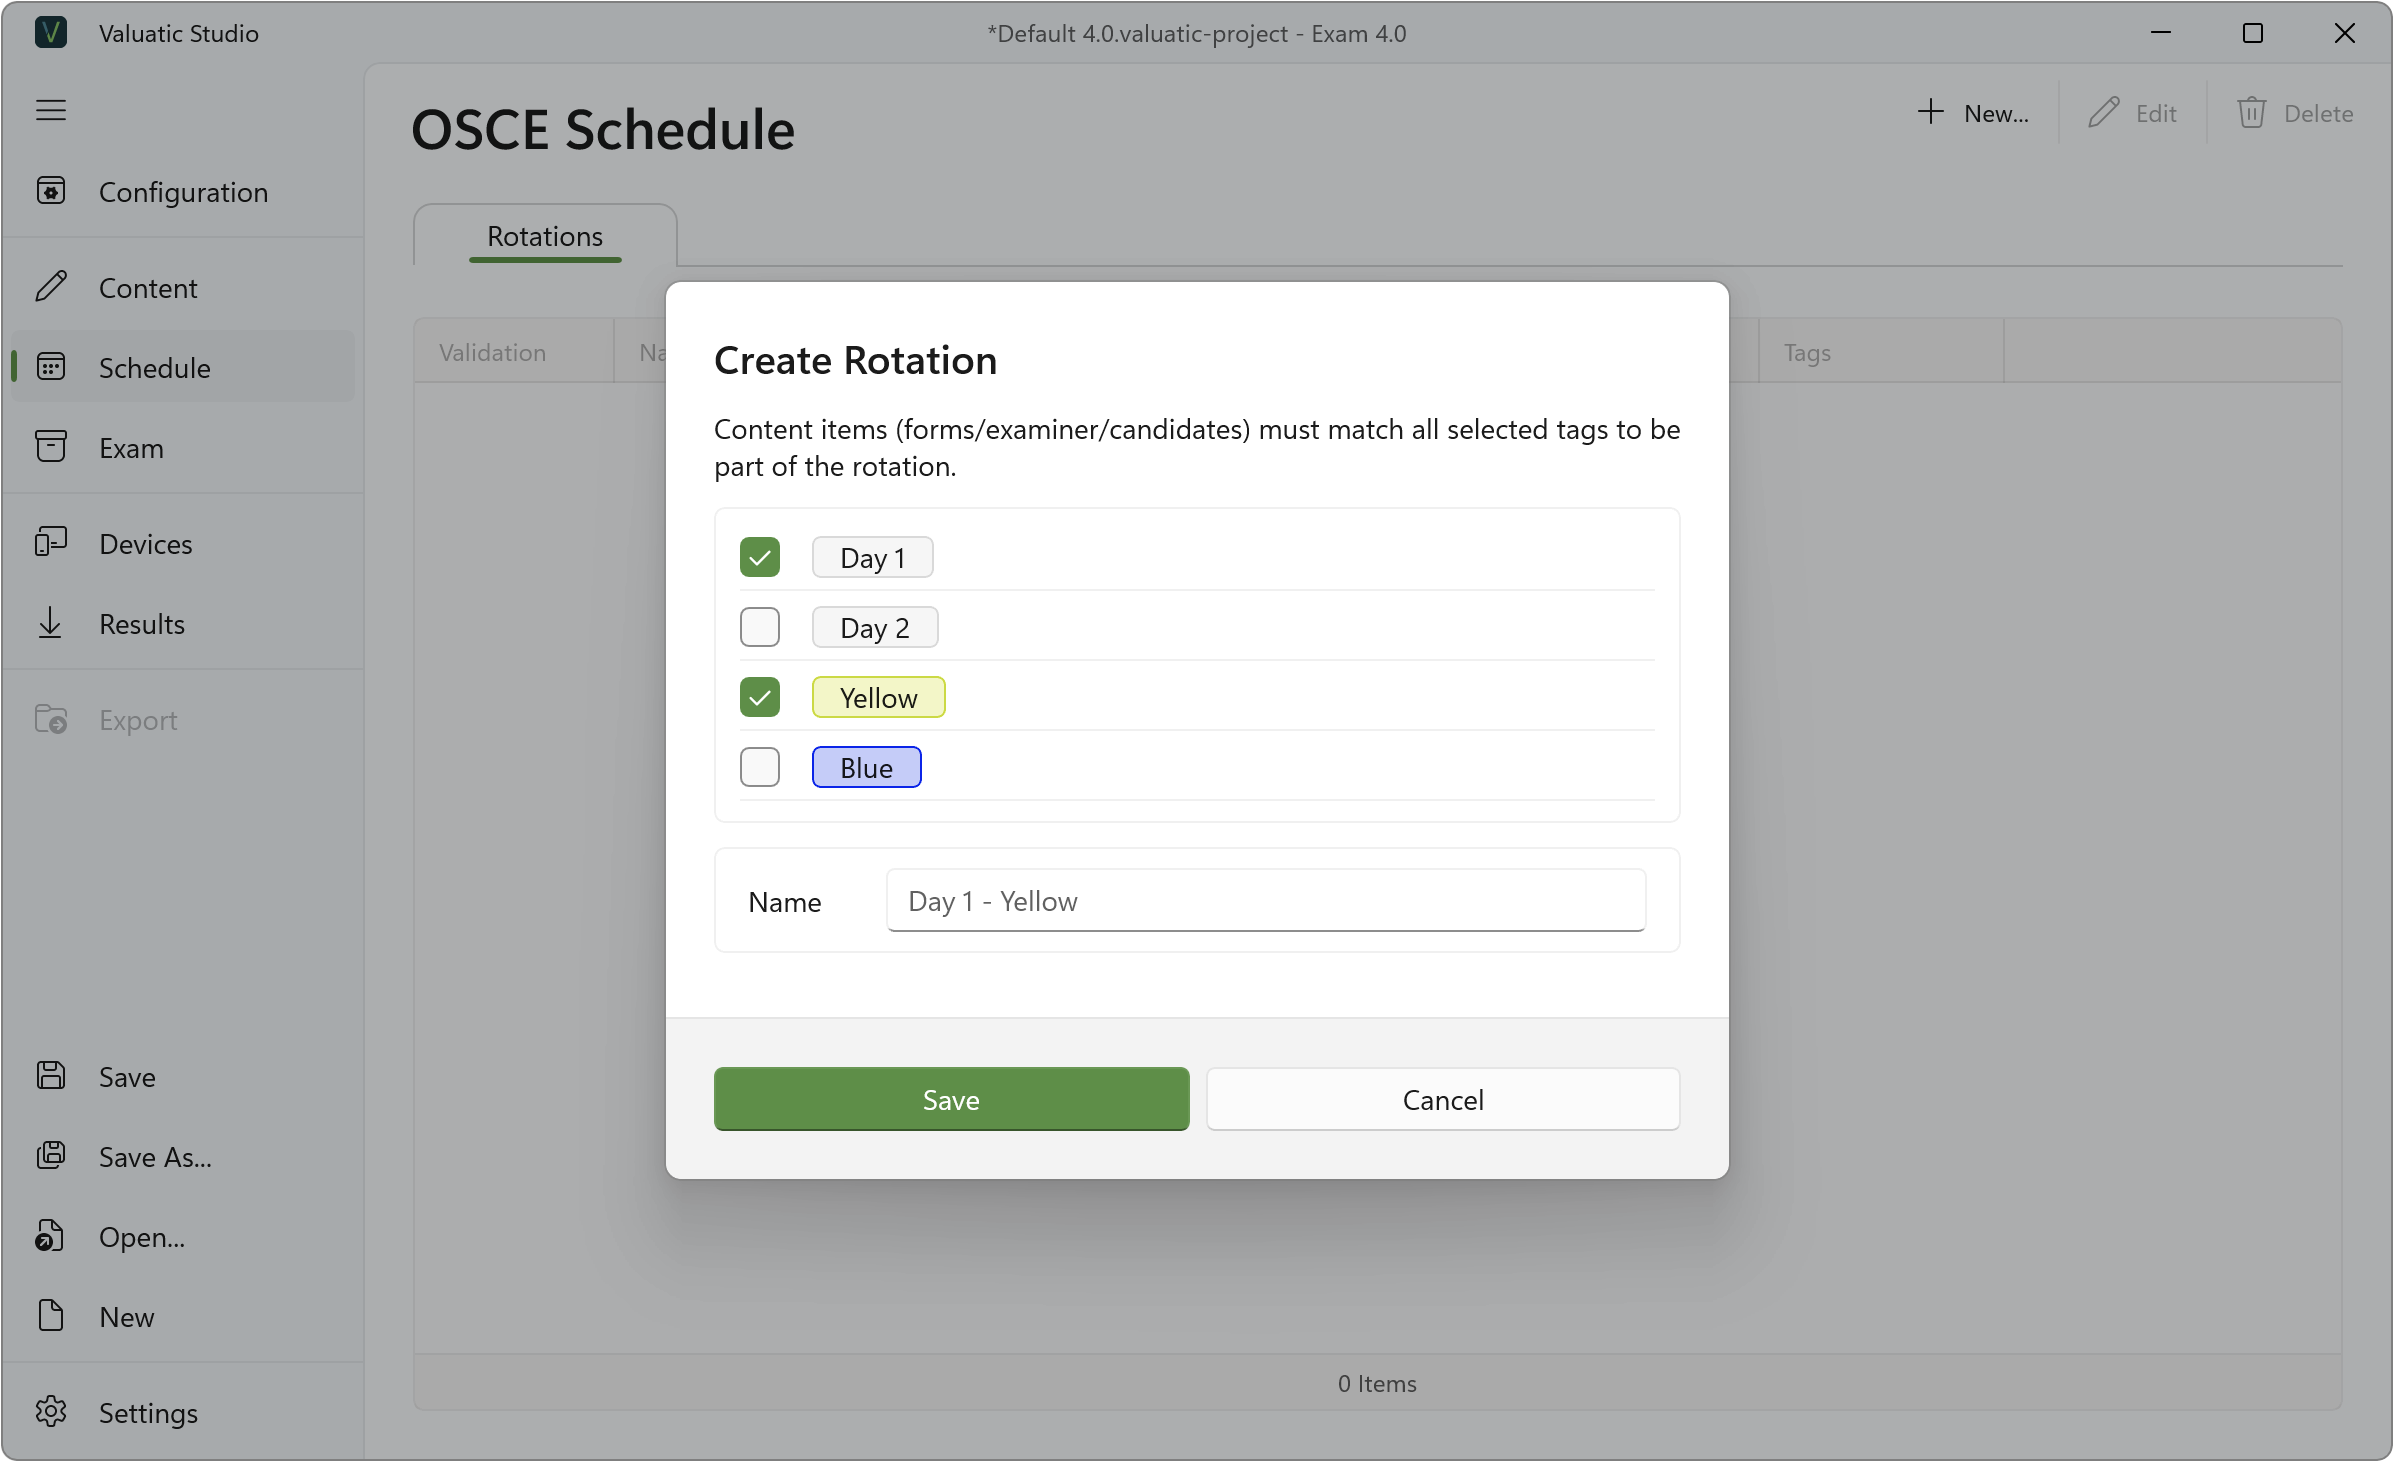
Repeat this for every rotation of your exam (e.g. Day 1 - Blue, Day 2 - Yellow, …).
Generate Stations
- Open the rotation by double-clicking it in the list.
- Click Generate Stations.
- A dialog shows how many stations and break stations will be created and how many forms, examiners, and candidates will be assigned. Click Generate.
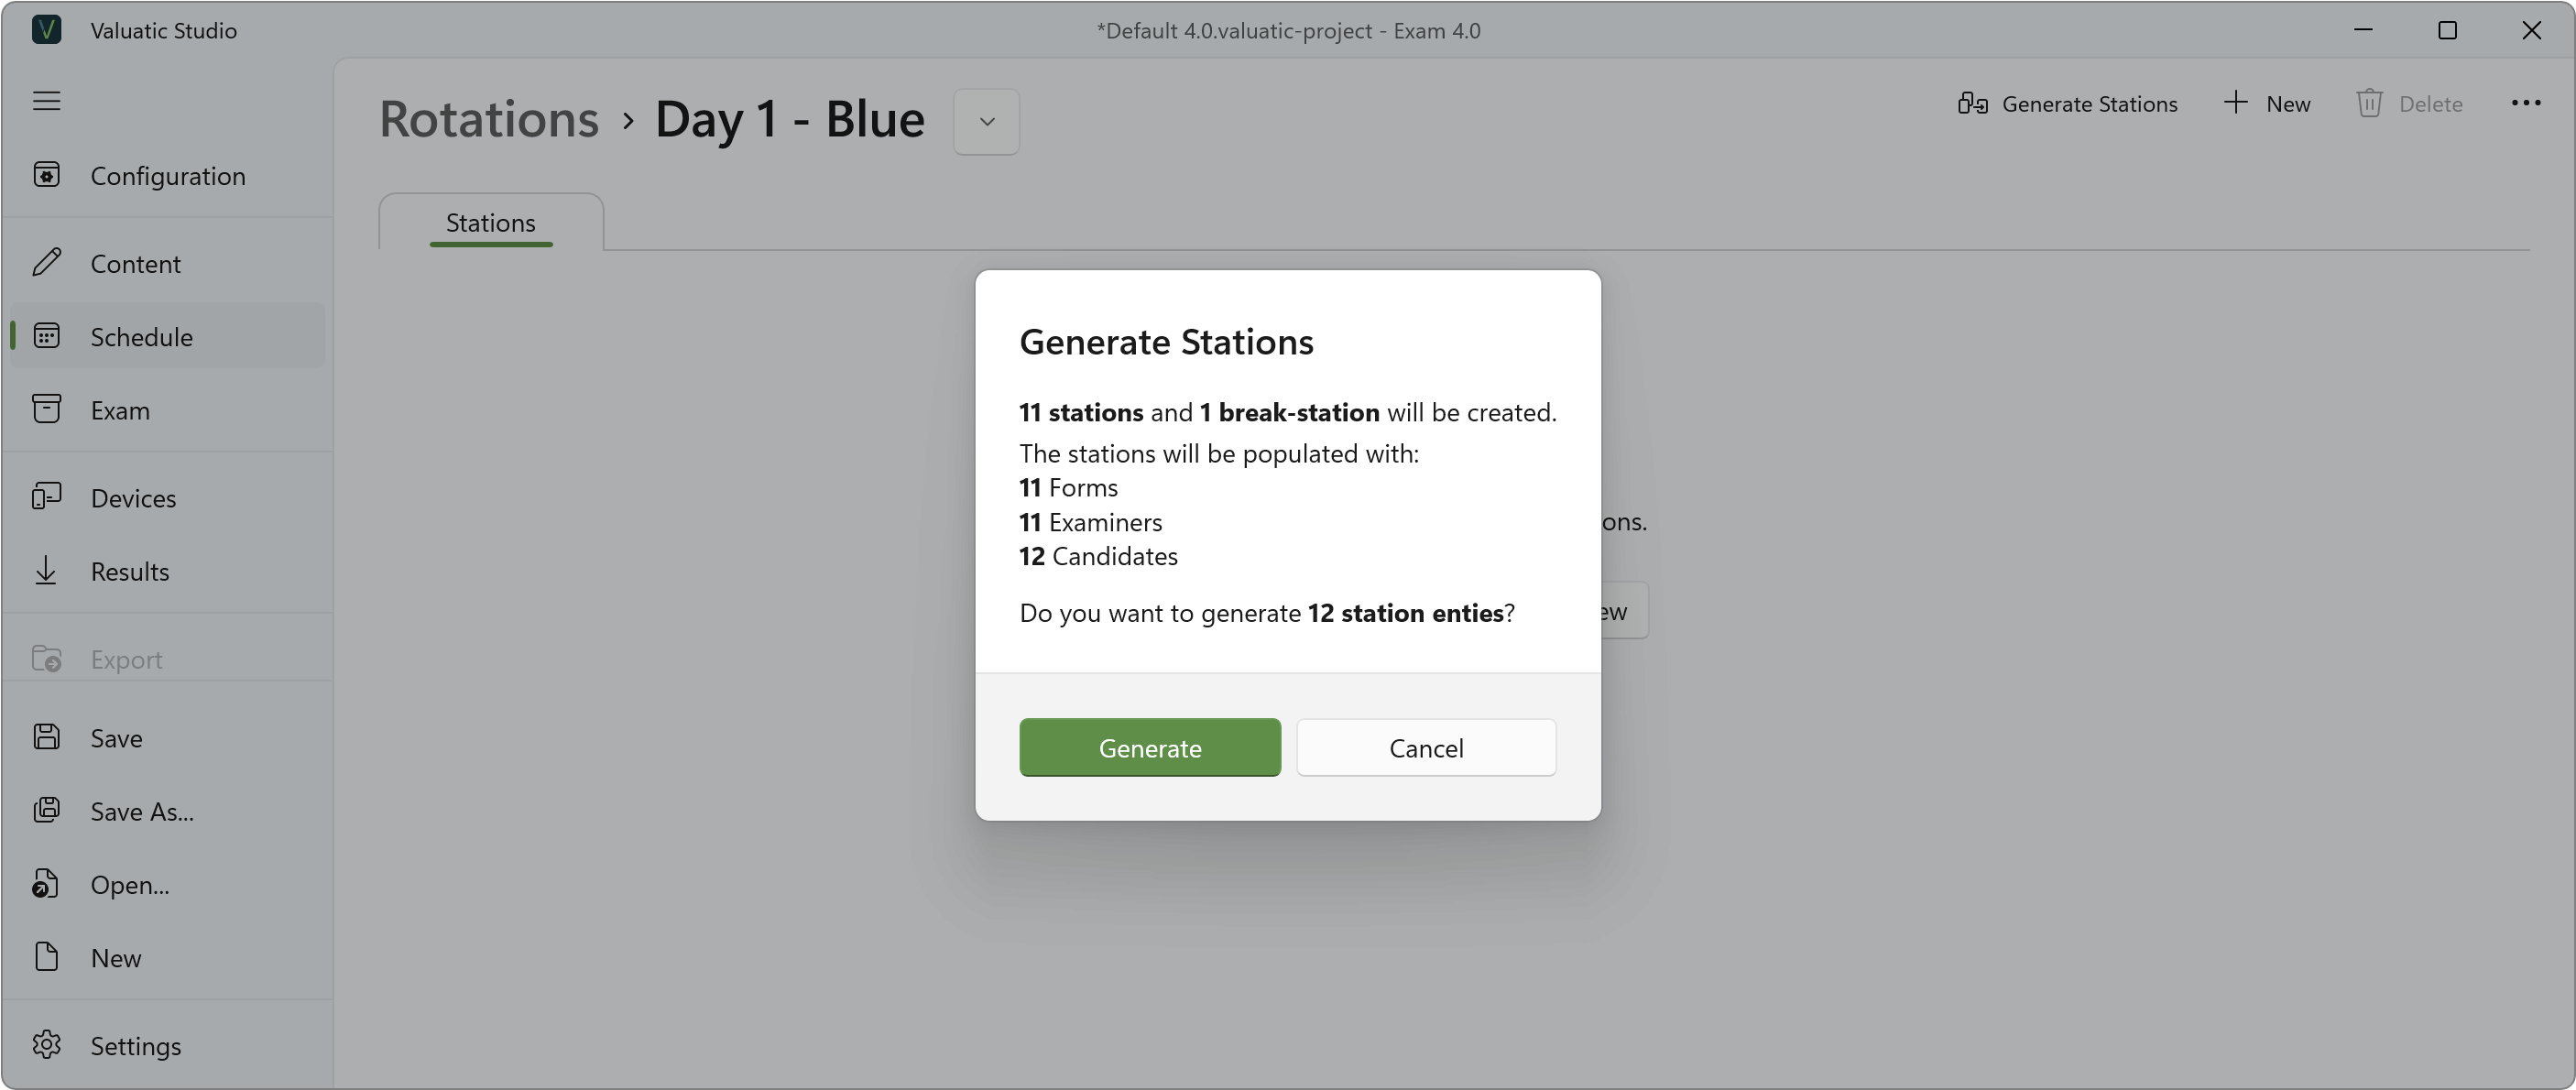
Valuatic calculates the number of stations from the content available for the rotation and adds break stations if there are more candidates than forms.
Review and Adjust the Stations
The generated stations are fully editable:
- Change the Station name directly in the text field.
- Change the Form, Examiner, or Start Candidate of a station using the dropdowns.
- Rearrange stations by dragging the handle on the left — the order defines the rotation order of the candidates.
- Add or remove stations with + New and Delete.
- Select Ghost Candidate as start candidate if there are more stations than candidates.
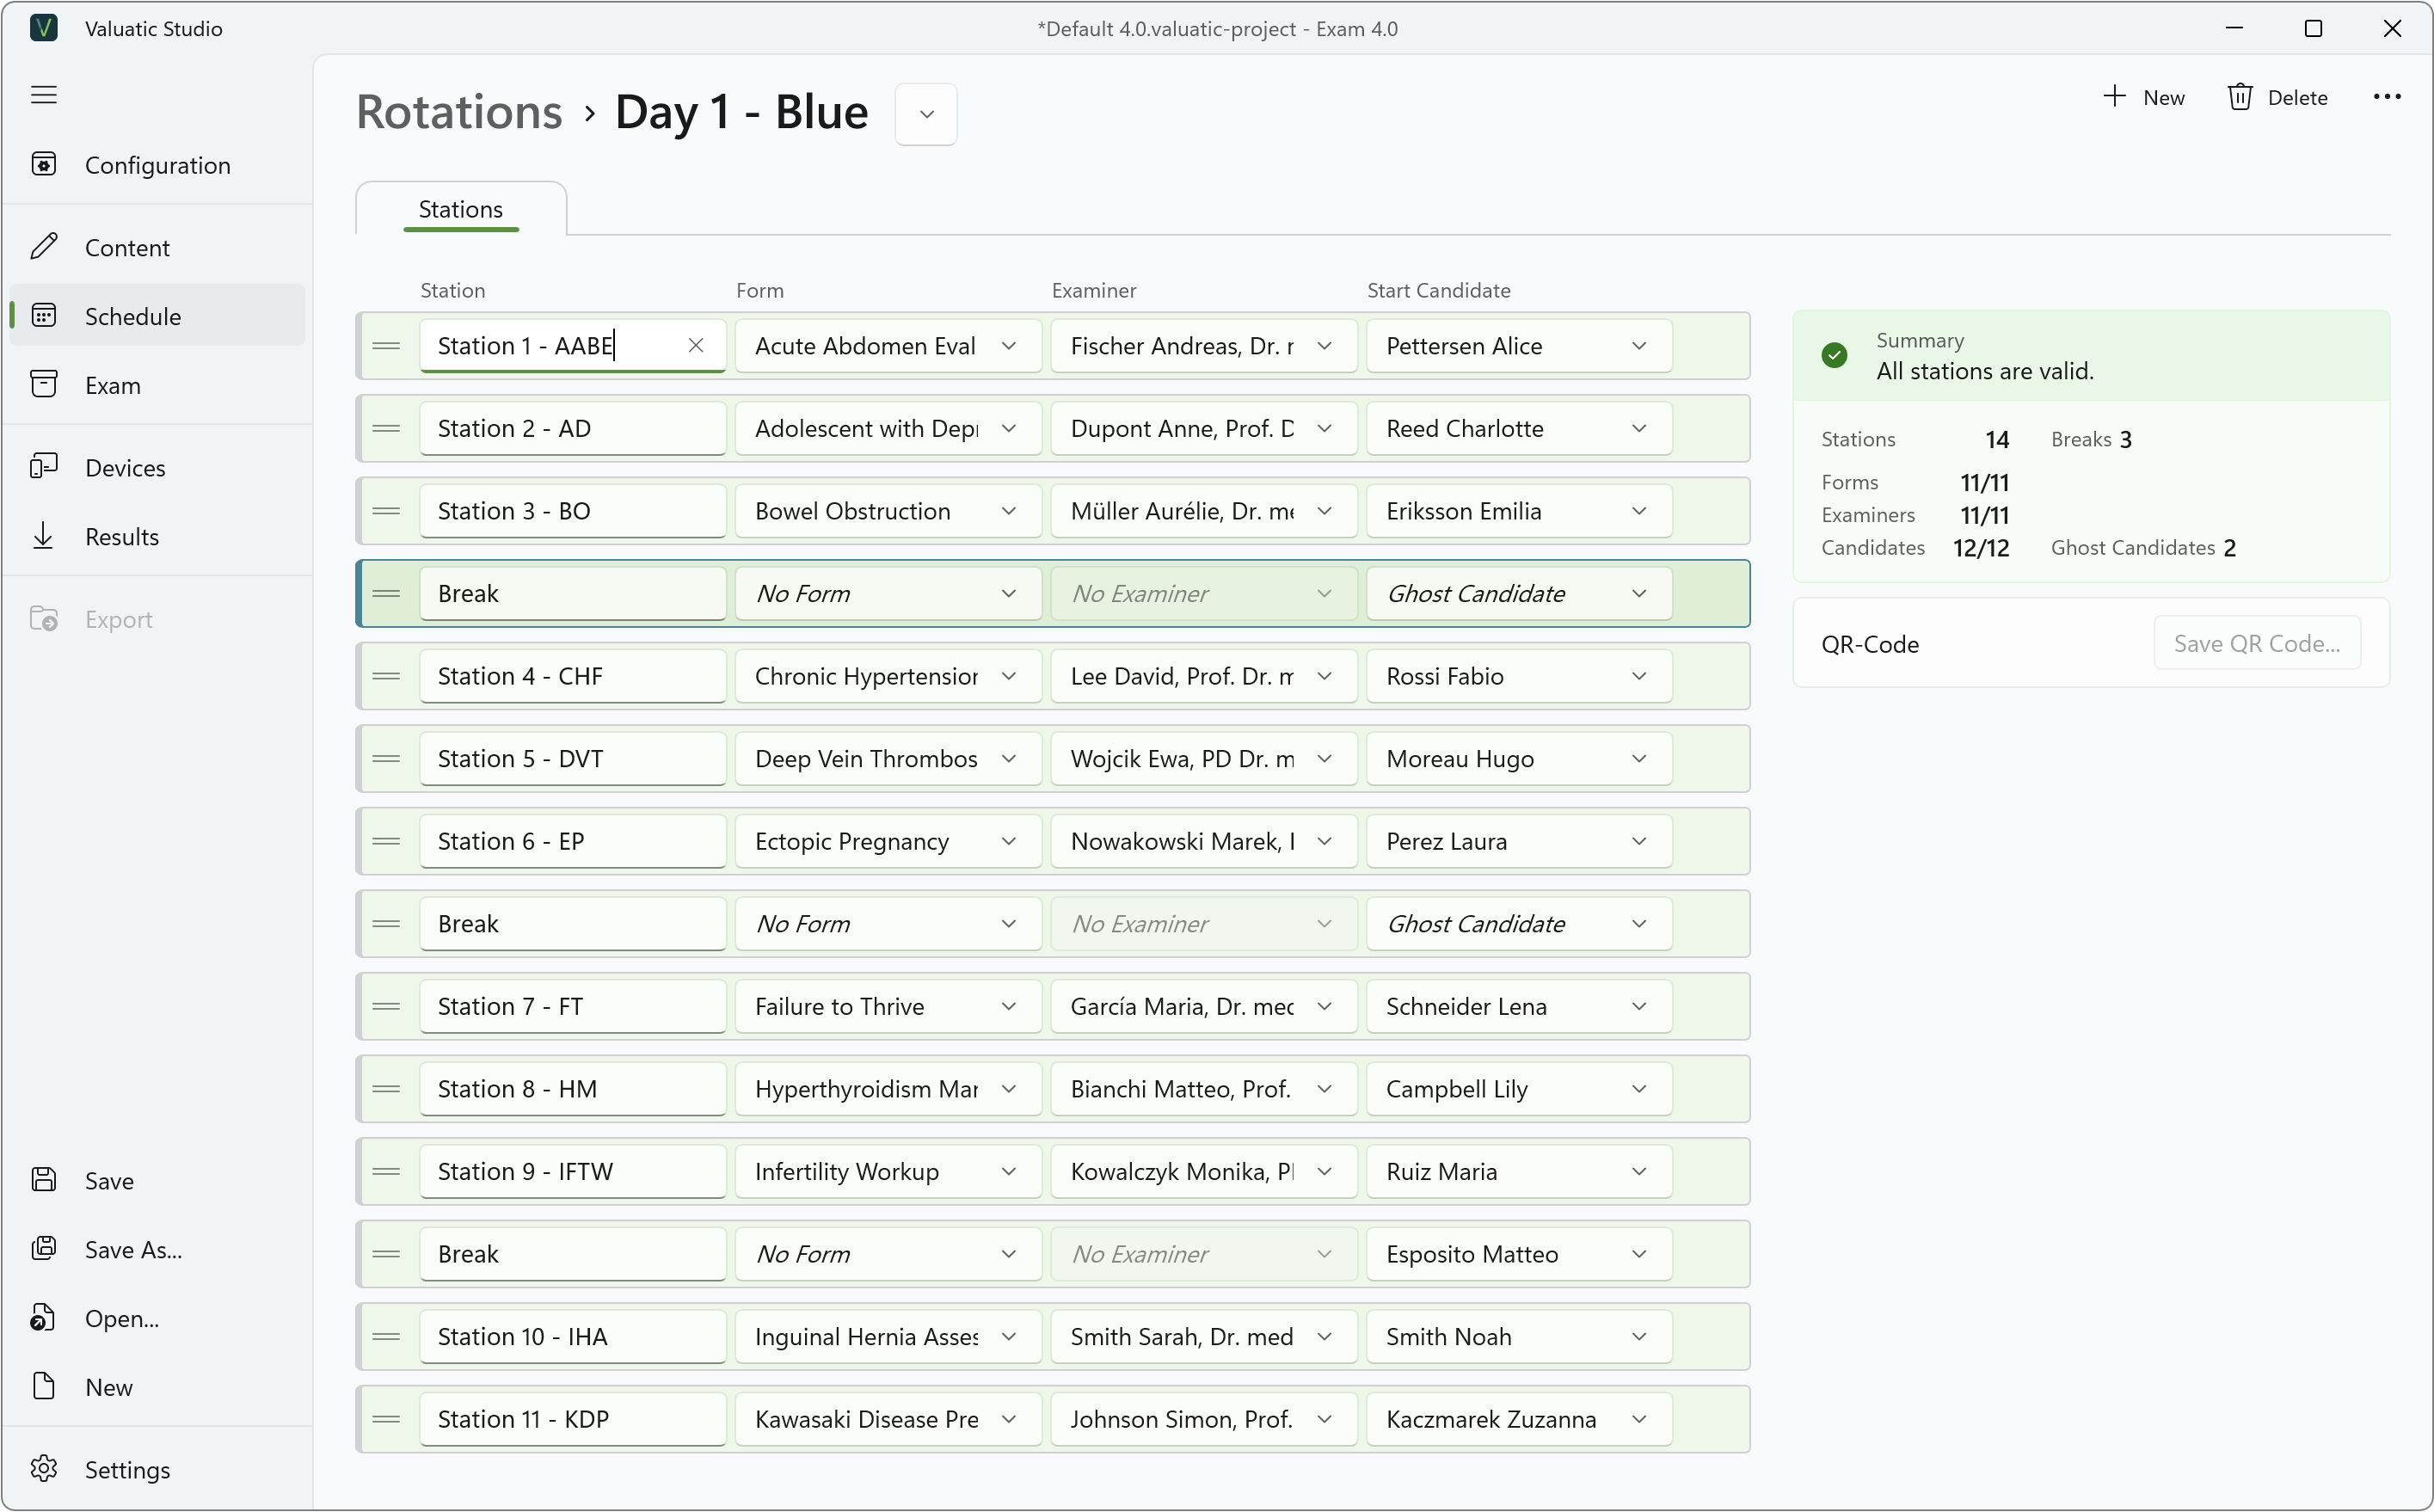
The Summary panel on the right validates your setup. Once it reports All stations are valid., your schedule is ready. 🚀